Before you begin
- You may have an existing account created with Intercom. If not, sign up with Intercom.
- Create a test workspace by following these steps from Intercom’s documentation.
- Once that is done, go back to the settings and expand the Developers section.
- Click on DeveloperHub and create an app.
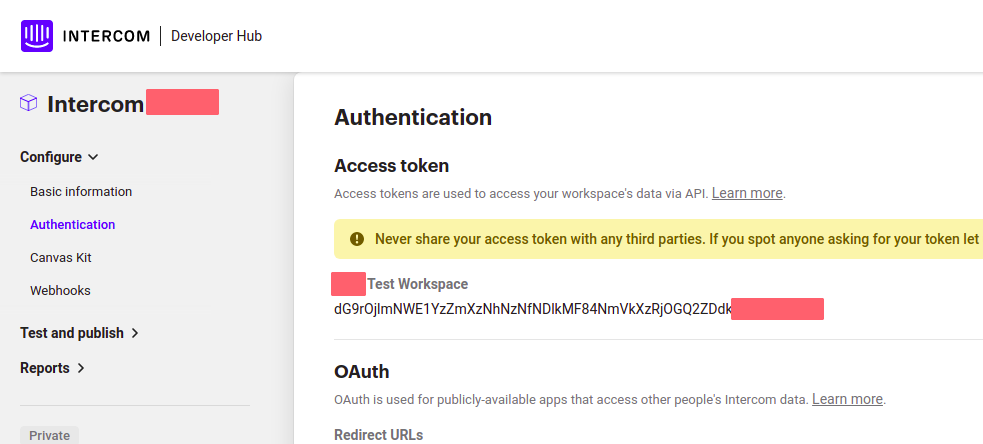
- Select the newly created app and go to the Authentication section.
- Copy the Access token as this will be required later.
The integration works with Intercom API Verion
2.3 (2020-11-12). If there’s a version mismatch, the extension won’t work.Extension settings
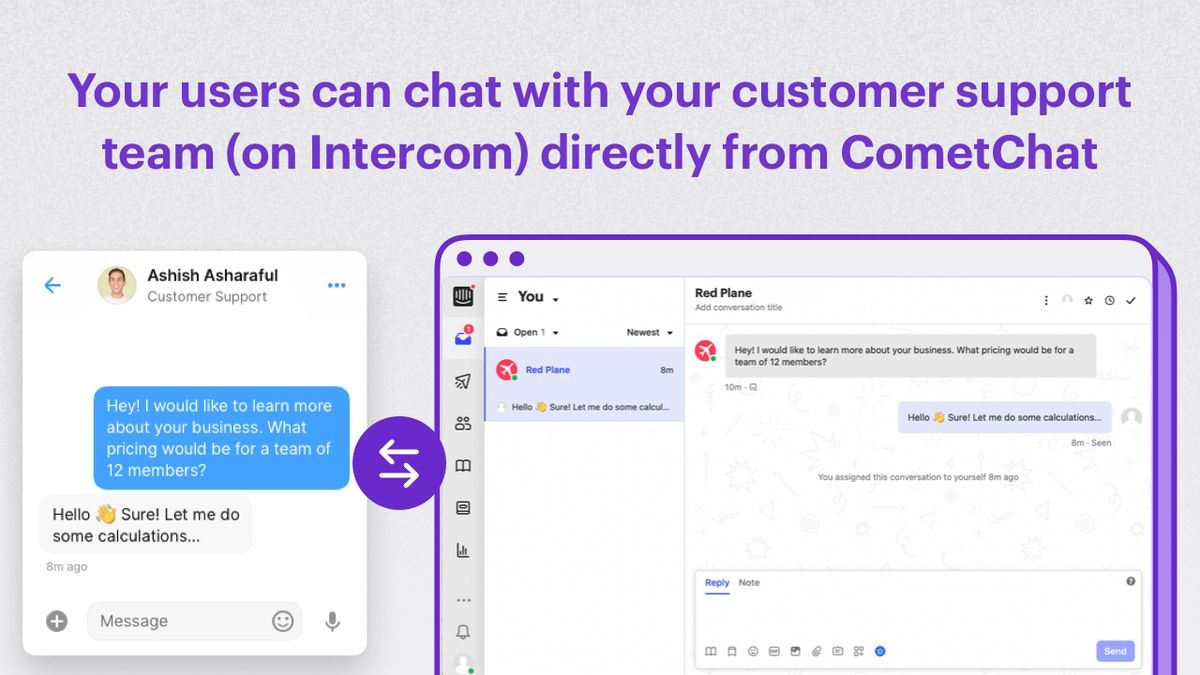
On CometChat Dashboard
- Login to CometChat and select your app.
- Go to the Extensions section and enable the Intercom extension.
- Open the Settings for this extension.
-
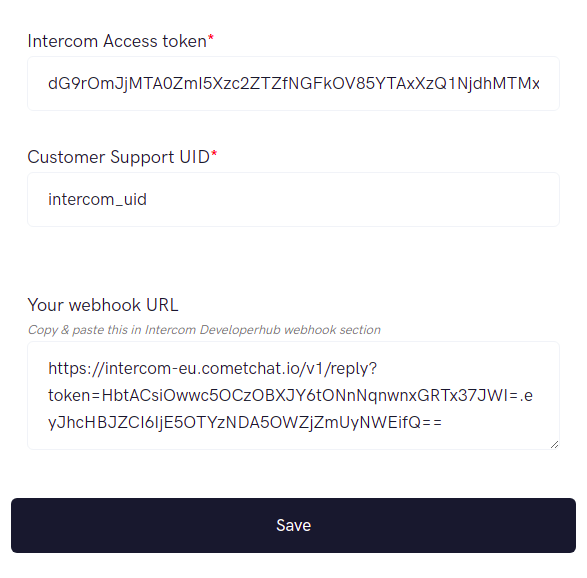
Enter the following and save your settings:
- Intercom Access token: Copied earlier from the Intercom Developer Hub.
- Customer Support UID: A user on CometChat that is your Customer Support user.
- Once you save your settings, a Webhook URL will be auto generated for your app.
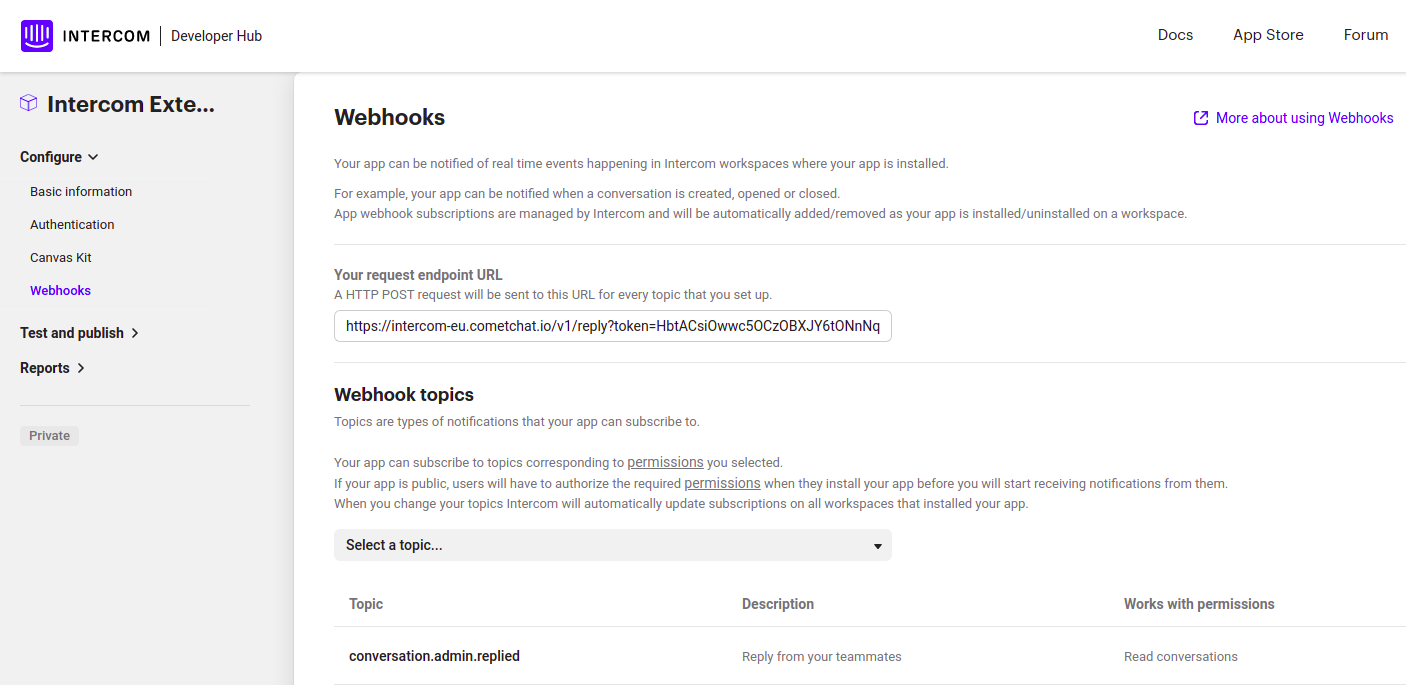
On Intercom Developer Hub
- Copy the above auto-generated Webhook URL and paste it in the Webhooks section on the Intercom Developer Hub.
- From the Webhook Topics, select
conversation.admin.replied